How It Works
AllStar public authentication is a mechanism that allows client applications to connect directly to a node and be verified via an AllStar account. Public authentication is configured by default on the standard AllStar server software. As such, most public nodes have that capability, unless the node owner chose to remove it.
When an application connects to a node using this public authentication method, the node performs a validation with the AllStar database to verify that the operator is known and authorized on the system.
This gives the node owner the convenience to allow any licensed operators to have access to their node, without requiring them to create individual account for each person. In turn, an operator can simply connect to the network, without being required to setup their own node.
This mechanism was first used in Web Transceiver. This application — a browser based Java applet — allowed users to connect to nodes directly from the AllStar node directory web page. Its convenience made it a popular choice for casually connecting to nodes. However, as modern browsers no longer support Java applets, Web Transceiver is no longer a viable option.
Public authentication is designed as a convenience for radio operators to connect to repeaters or network hubs with minimal fuss. When connecting to a node via public authentication, Transceive disables node management commands, such as linking or unlinking. This is done to protect the node owner from inadvertent changes in their network structure. To have access to these type of operations, you need to connect with specific node credentials. See information on how to configure such credentials on your node or ask the node owner to provide them for you.
Authorize
You can authorize Transceive to use your AllStar account when connecting to nodes via the public authentication mechanism.
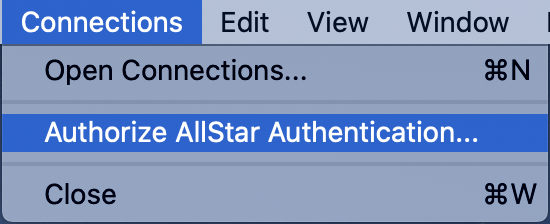
Select the Authorize AllStar Authentication... option from the Connections menu.

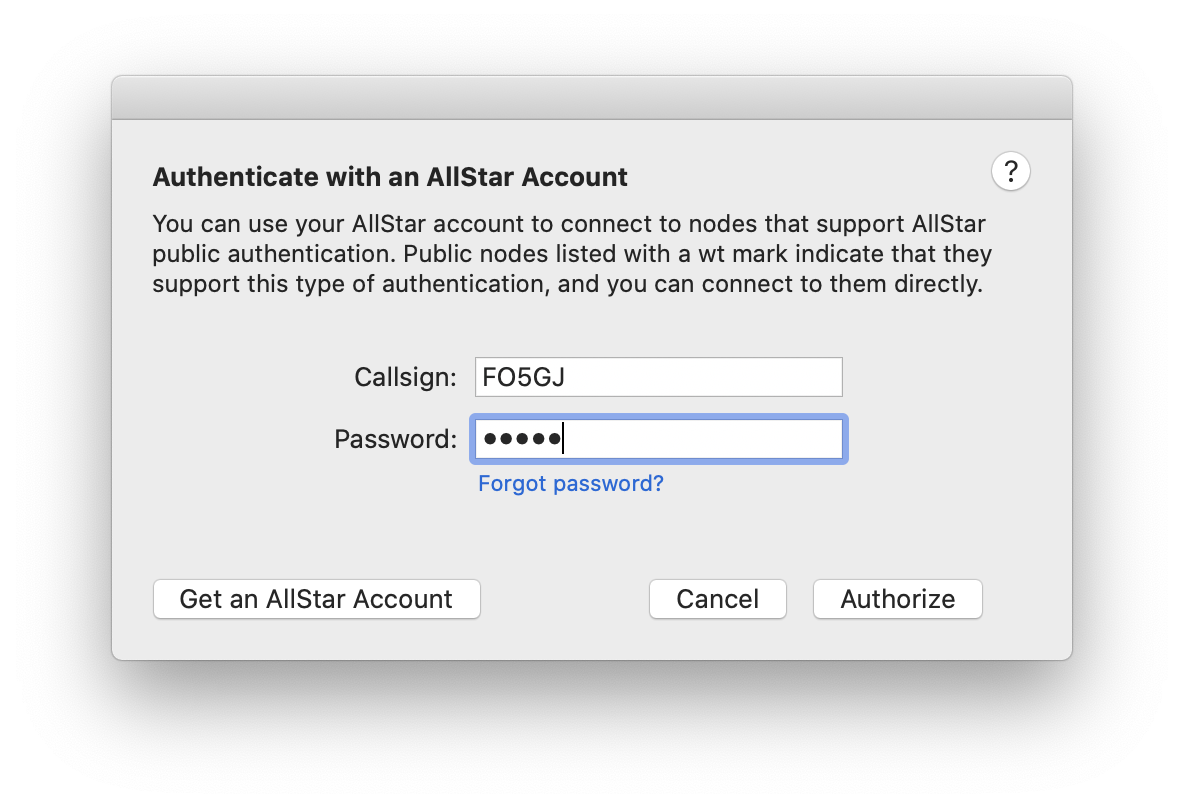
Provide your callsign and AllStar account password. Transceive will retrieve an access token and store it securely in the macOS keychain.

Revoke
If you want to stop Transceive from using your AllStar account token for purpose of public authentication, you can revoke your previous authorization.
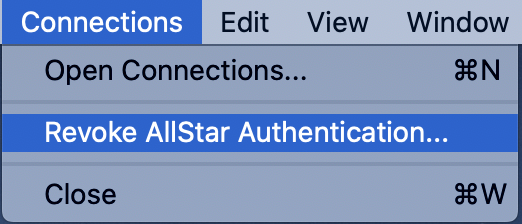
Select the Revoke AllStar Authentication... option from the Connections menu.

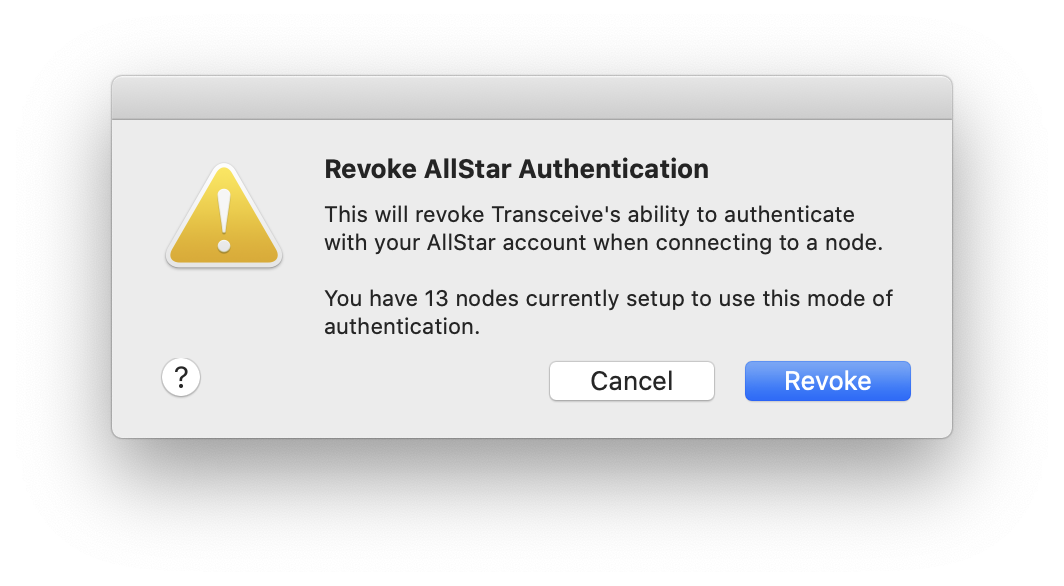
Transceive will inform you if any of your node connections are configured to utilize the public authentication. Once you revoke your authorization, you will no longer be able to connect to those nodes. If you attempt to connect, the connection will fail and the node status indicator will turn orange.
Authorizing Transceive again, will restore the ability to connect. This does not require any change in the node connection settings.

AllStar Account: Sign up
An AllStar account can be used to connect directly to public nodes. A valid callsign is required to sign up for an AllStar account. The AllStar administrative team will verify your callsign before issuing your account.
Once you have an account, you don't need to obtain a node number unless you intend to setup your own node.
AllStar Account: Forgot Password
If you've forgottent the password for your AllStar account, you can initiate a password recovery.
Public Authentication Configuration
The default configuration of the AllStar server software contains a standard public authentication section. If your installation does not contain the default configuration or if it was deleted for some reason, you can restore it.
To enable the use of AllStar public authentication on your node, make sure this section exists in
/etc/asterisk/iax.conf
[allstar-public]
type = user
context = allstar-public
auth = md5
secret = allstar
disallow = all
allow = ulaw
allow = gsm
requirecalltoken = no
and that the following context is present in
/etc/asterisk/extensions.conf
[allstar-public]
exten => s,1,Ringing
exten => s,n,Set(RESP=${CURL(https://register.allstarlink.org/cgi-bin/authwebphone.pl?${CALLERID(name)})})
exten => s,n,Set(NODENUM=${CALLERID(number)})
exten => s,n,GotoIf($["${RESP:0:1}" = "?"]?hangit)
exten => s,n,GotoIf($["${RESP:0:1}" = ""]?hangit)
exten => s,n,GotoIf($["${RESP:0:5}" != "OHYES"]?hangit)
exten => s,n,Set(CALLSIGN=${RESP:5})
exten => s,n,Wait(3)
exten => s,n,Playback(rpt/node|noanswer)
exten => s,n,Saydigits(${NODENUM})
exten => s,n,Set(CALLERID(name)=${CALLSIGN})
exten => s,n,Set(CALLERID(num)=0)
exten => s,n,Rpt(${NODENUM}|X)
exten => s,n,Hangup
exten => s,n(hangit),Answer
exten => s,n(hangit),Wait(1)
exten => s,n(hangit),Hangup
Restart the node after you modify the configuration.
In addition, make sure your node configuration in the AllStar portal is set to Allow Web Transceiver access. It will ensure that the (wt) mark is displayed next to the node number in the directory. Users will know that your node is publicly accessible.
