Connection Configuration
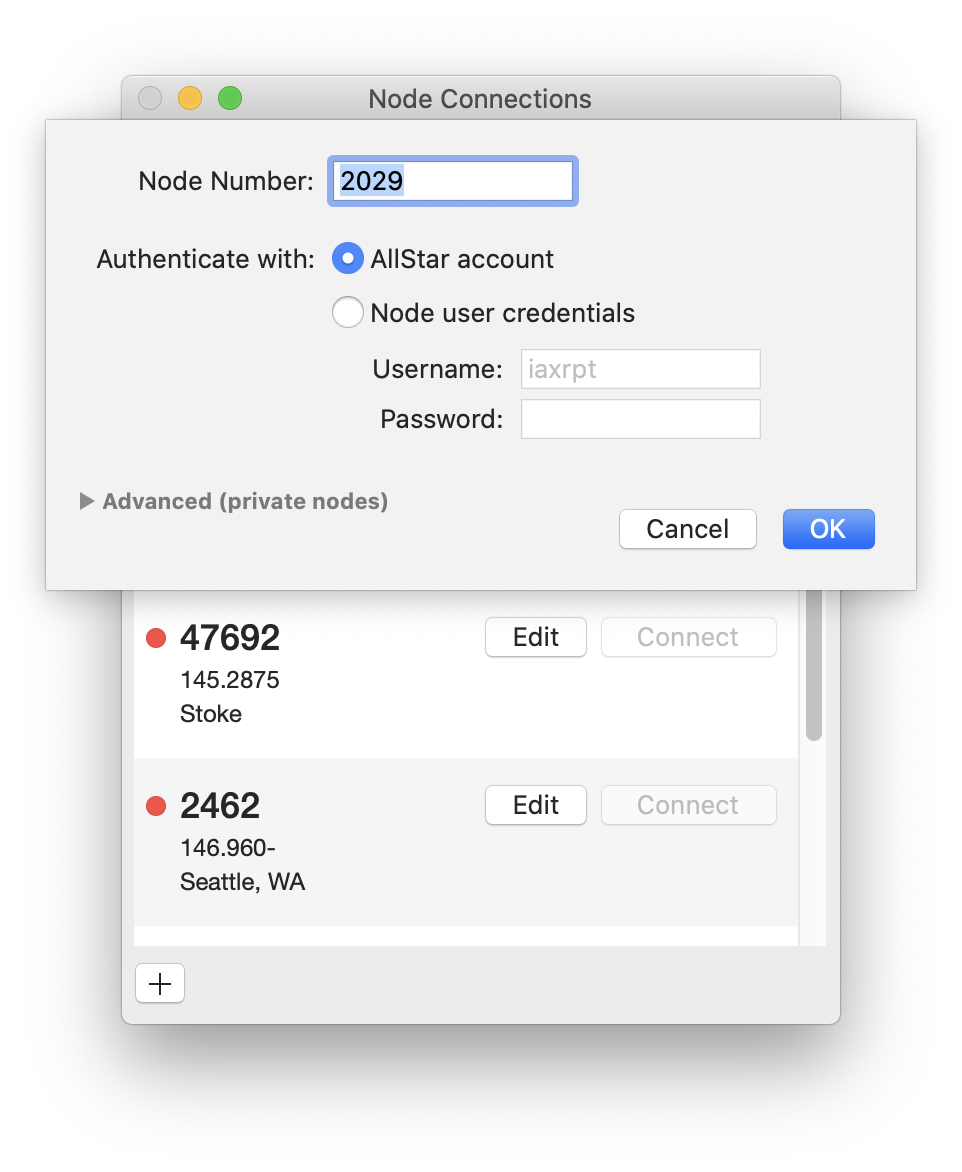
Transceive authenticates with nodes in two ways. If you own a node, you will need specific credentials to connect to it. If you want to connect to other public nodes directly, you can use an AllStar account. Transceive will then connect via the public authentication mechanism.
Once you authorize Transceive to use your AllStar account for authentication, this option becomes available in the node connection edit dialog.
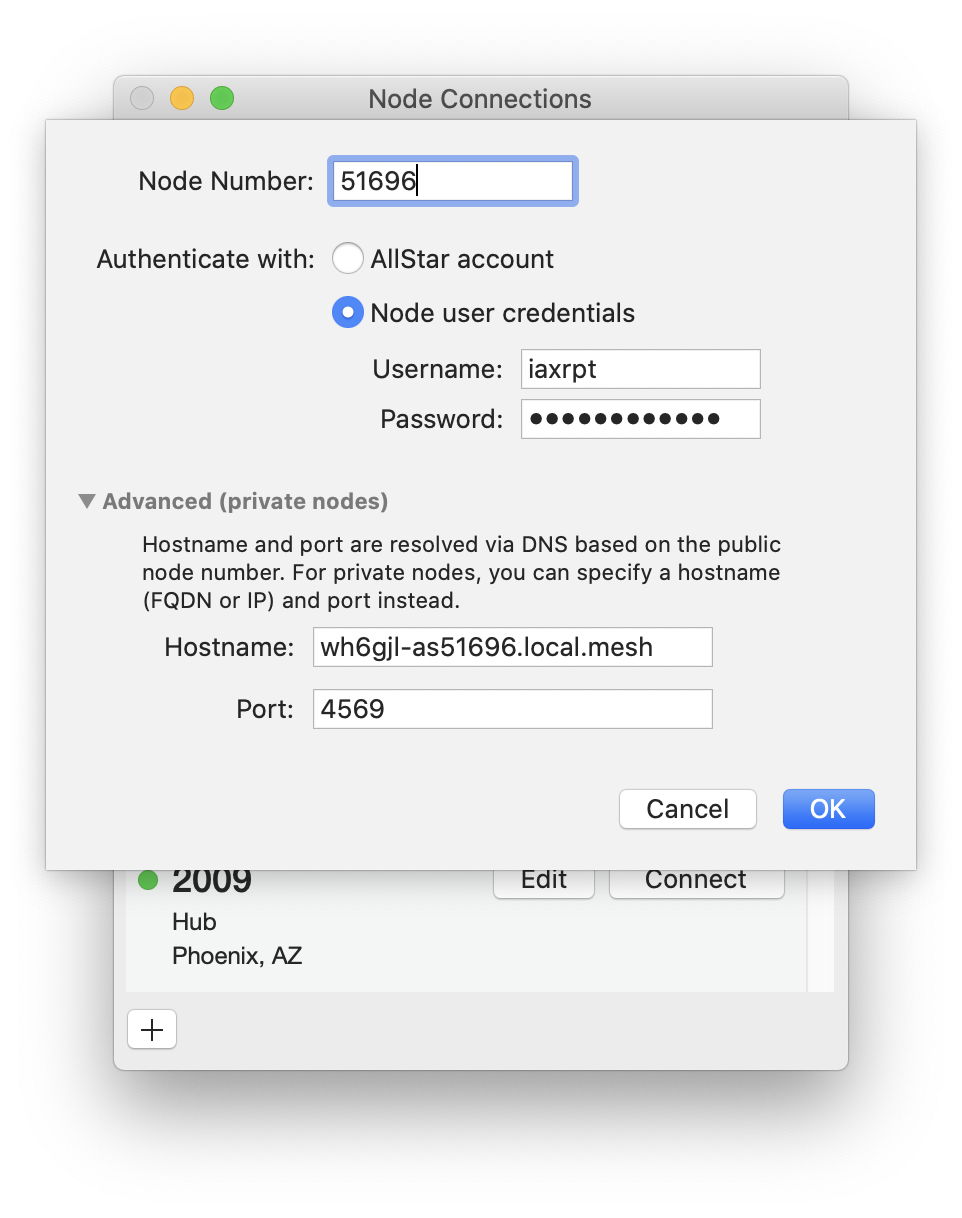
If you choose to use your own node credentials, select that option and provide the node username and password. Passwords are stored securely in the macOS Keychain.
For registered node, you only need to provide the node number. If the node is private or not registered in the AllStar directory, you can specify a hostname and port in the advanced section.
Advanced Configuration
For registered nodes, Transceive resolves the node's ip address and port number via DNS. For private nodes that are not registered with the AllStar directory, you can specify a host and port number.
Status Indicators
For each node setup in the connections window, Transceive will perform a basic network check to validate if the node can be reached. A green dot indicates that the node is online and can be connected to. Red means the node is either offline, or that it can't be reached via the current Internet connection. Amber means the node can be reached but the most recent authentication attempt has failed. This is likely due to an invalid username or password.
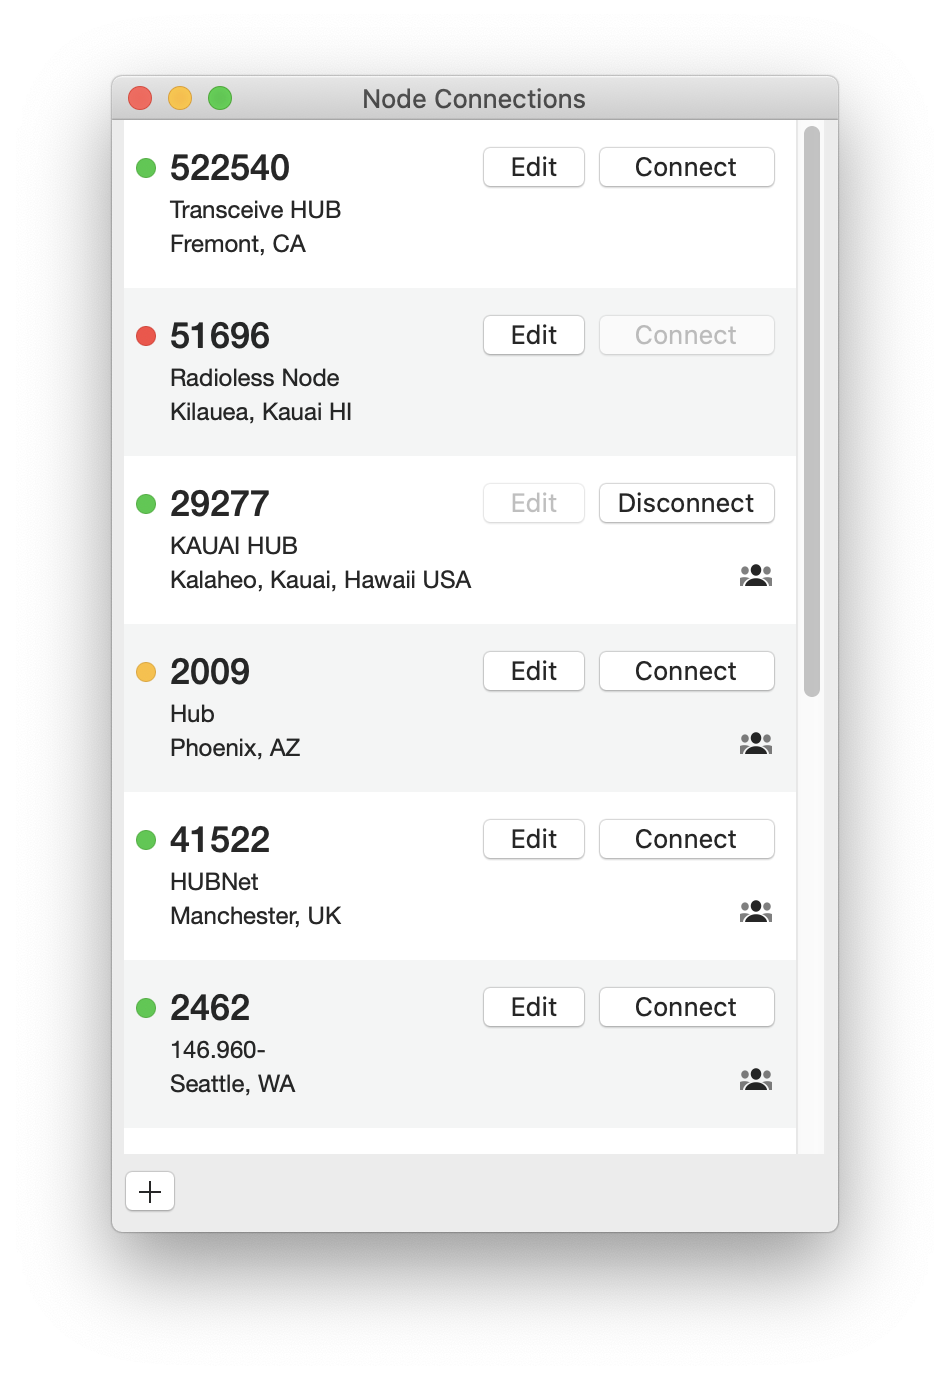
Transceive will detect changes in network connection, for instance when you select a new WiFi, and will automatically re-check nodes availability. A similar check is performed when the computer wakes up from sleep, for example when you open a previously closed laptop with Transceive running.
In some rare situation, a node DNS entry may not be returned properly, resulting in a red status for that node. If you know the IP and port of the node, adding this in the advanced configuration may solve the problem.
Node Credentials
Transceive requires a username and password to authenticates with a node. If you own a node, you can add specific credentials by adding the following to your configuration. Additionally, you can verify that public authentication is configured on your node.
To add a user to your node, add this section to
/etc/asterisk/iax.conf
[user_name] ; <- change this to desired username
type=user
context=transceive
auth=md5
secret=Sekret ; <- change this to desired password
host=dynamic
disallow=all
allow=ulaw
allow=gsm
transfer=no
Add the following context to
/etc/asterisk/extensions.conf
[transceive]
exten => ${NODE},1,rpt(${NODE}|X) ; NODE is normally already defined as your node number
Or for AllStarLink version prior to v3
[transceive]
exten = 1234,1,Rpt,1234|X ; <- Change 1234 to your node number
Restart the node after you modify the configuration.
HamVoIP 1.7
HamVoIP latest node software version 1.7 contains changes affecting IAX client applications such as Transceive. In order for Transceive to continue to connect to the node, the following configuration needs to be added:
In the client configuration section of
/etc/asterisk/iax.conf
[user_name]
requirecalltoken=no
and in
/etc/asterisk/rpt.conf
propagate_dtmf=yes
propagate_phonedtmf=yes
remote_dtmf_allowed=1
Restart the node after you modify the configuration.
DNS Lookup
By default Transceive performs a dns query to lookup the IP address and port of the node you're trying to connect to. You can verify that the address is resolved properly on your computer by typing this command in Terminal (replace 522540 with your node number).
dig a +noall +answer 522540.nodes.allstarlink.orgIf your DNS configuration is set up properly and the node you're connecting to is registered in the AllStarLink database, you should get an answer similar to this (the IP address in the answer will be specific to your node).
522540.nodes.allstarlink.org. 30 IN A 66.175.217.225If all looks good, you can try the next command (again substitute 522540 with your node number).
dig txt +noall +answer 522540.nodes.allstarlink.orgYou should get the following answer.
522540.nodes.allstarlink.org. 30 IN TXT "NN=522540" "RT=2020-10-20 02:46:01" "RB=0" "IP=66.175.217.225" "PIP=0" "PT=4569" "RH=register2-cqf"PT=4569 indicates the port number that you configured when registering the node in the AllStarLink database.
Tips
If for some reason your node address and port do not resolve properly here are a few things to consider:
- Make sure your computer has an Internet connection.
- Verify that your DNS configuration is correct. If you're having problem with your DNS provider, you can use public DNS servers such as CloudFlare or OpenDNS or Google DNS.
- Check your node configuration in the AllStarLink database.
- Verify that your node is running and registering itself properly with the AllStarLink server.
Valid Route
Next step is to ensure your computer has a valid route to the node. Type this command in Terminal (replace 522540 with your node number).
traceroute 522540.nodes.allstarlink.orgAfter a few second you should get a response similar to this. Your result will be different. If the last line contains your node IP address, it means that it can be reached successfully.
traceroute to 522540.nodes.allstarlink.org (66.175.217.225), 64 hops max, 52 byte packets
1  172.16.0.1 (172.16.0.1) 118.333 ms  138.662 ms  118.618 ms
2  8.47.69.1 (8.47.69.1) 130.564 ms  156.421 ms  130.481 ms
3  206.72.211.198.any2ix.coresite.com (206.72.211.198) 229.591 ms  165.677 ms  156.773 ms
4  173.230.159.65 (173.230.159.65) 214.764 ms
   173.230.159.67 (173.230.159.67) 191.605 ms  90.692 ms
5  li512-225.members.linode.com (66.175.217.225)  91.445 ms  88.611 ms  96.509 ms
UDP Port
Last step is to verify that you can establish a connection to the UDP port on your node (replace 66.175.217.225 and 4569 with your node IP address and port respectively).
nc -v -u -z -w 3 66.175.217.225 4569You should get the following response.
Connection to 66.175.217.225 port 4569 [udp/iax] succeeded!
If the
nc
command is not found on your Mac you need to install the netcat utility. You can do it with
brew install netcat.